
|
Andy & Tracy Dixon | |
| Roadsport SV - Ford Sigma 125 | |
| Hi Im Andy and Ive considered buying a Caterham just twice! First time in 1985 and then again in 2007, there wouldnt be a third time after Tracy and I called in at CC Midlands just to have a look. Before we set off the idea was that we would buy a starter kit then spend a couple of years putting it together. That was the plan but you cant beat the whiff of Petrol and copious amounts of Leather and Rubber to get you thinking I WANT ONE and I WANT IT NOW. | |
| Almost any Caterham was going to give me the driving experience I wanted so although launch speed was interesting I didnt need my insides rearranging every time I set off through Beverley Bar. The S3 was on my shopping list but there was always the question of whether I would fit? In the end I slipped into an SV and my size 11s fitted perfectly so we went away to have a think about it. Two weeks later and were back with our order form and the boxes ticked for a Sigma 125 powered Roadsport SV in Aztec Orange with black nose band, trackday rollbar, leather seats, 4 point harnesses, Momo Steering wheel and a big red start button. I felt like a kid in a sweetshop! | |
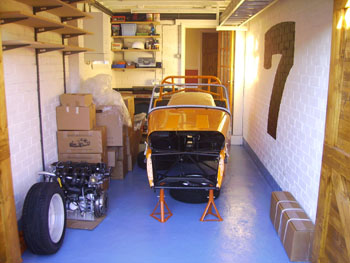 |
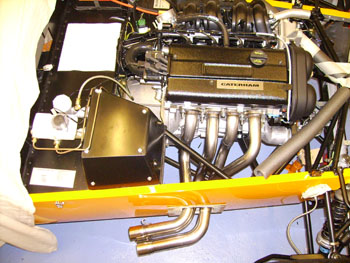
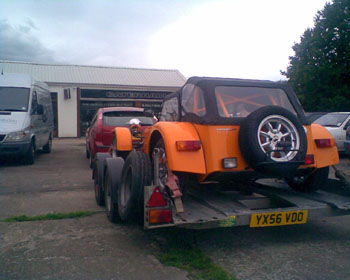
The kit arrived on November 11th 2007, that was great but where was I going to put all the bits! There seemed to be an awful lot of boxes for such a small car and I began to wonder if Id have enough room. We never set a date when the car had to be finished so we could please ourselves how much or how little we did. The problem was that once you started it was difficult to walk away. What follows is a brief account of the next few months. I stuck to the build manual except for a few deviations when I had shortages. These shortages were just a part of the experience and most of the time I had my missing parts within a couple of days. |
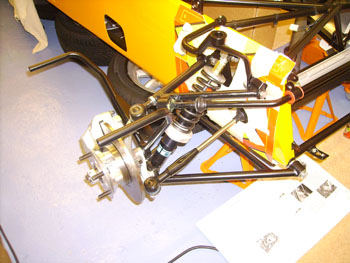
| Front suspension was pretty basic once I found where the washers went on the lower wishbone. I started looking around the web and found the build manual on CCs site. Lo and behold it was an updated version to the one I received only a month ago and showed me just what I wanted, its easy when you know how. Fitting the headlamp brackets showed that they were a few degrees out to the chassis bush, putting the bracket in a vice and giving the tube a swift pull with a piece of 1 pipe around it sorted that job out. |
|
 |
 |
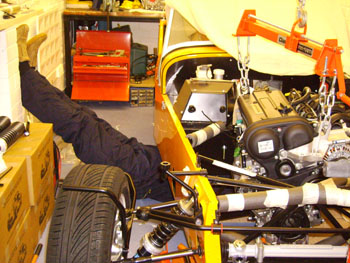
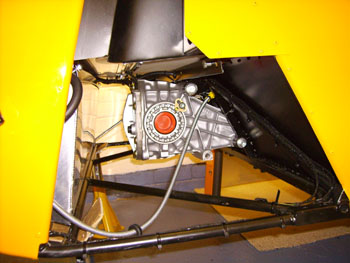
| The load leveller was one piece of kit that made fitting the engine a doddle. It still took us a few hours because Im a bit .. OK then a lot fussy about causing any damage. Engine in, and I went underneath to fasten up the gearbox. This was post Christmas and Im sure the car had got a bit lower on the stands, or was it me that had grown? | |
 |
 |
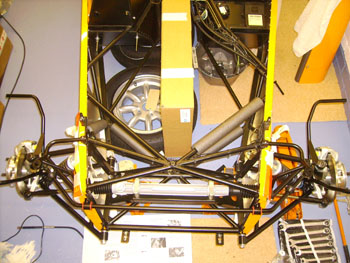
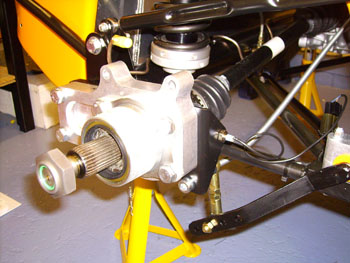
| Id read a few people had difficulty fitting the diff so I tried to make it easy from the beginning by clearing the casting seams from the inner face of the mounting holes. From there on it was just awkward rather than difficult to fit. We jacked the diff from underneath and steadied it on a rope through the boot floor making it fairly easy to shim into the centre. With the De Dion piped up and brake pipes bent to meet the temporarily fitted calliper it was just a matter of slotting the tube through the car. The rear suspension was straight forward. If you miss anything here it would most likely be the screw above the coil over that holds the roll bar on, but I didnt. |
 |
| I cant think why there wasnt a purpose made fix for the opening into the bell housing but it needed some attention to prevent grit and muck getting in.I think the casting was shaped to go around the starter motor on the Fiesta/Focus but it clearly didnt look right forward facing on the Caterham. Id seen an infill plate created by a Gent I met on Flickr so I nicked the idea. A piece of old window frame cut and filed to shape was just the ticket. |
|
 |
The smallest jobs seemed to be getting the better of me. The speed sensor bracket also locates the upper end of the ARB drop link. Ok with the side with the speed sensor but I was puzzled on what to do with the opposite side where there was no sensor or bracket? I like symmetry and couldnt work out how to even up the links when they mounted at such different heights. A few days went by and I went raking through the last few boxes and came across 2 more brackets. >IDEA< I can use these, theres one for each side and they were handed! It turned out that the revised WEB Manual also showed the new style bracket, I was just sent both types. |
| The brakes were sorted out with the help of an Easy Bleed, although the first time I pressurised the system I dashed to the first brake and waited
and waited but there was only a dribble, whats that noise? I duck down and looked under the car to see fluid all over the floor. When I take a look the bulk head fitting on the rear flexi pipe was the culprit. It was tight but tight on the bulkhead rather than the taper of the fitting. The washer arrangement looked OK by the manual but I took one out and swapped it with one of a lighter gauge to get a good seal. |
 |
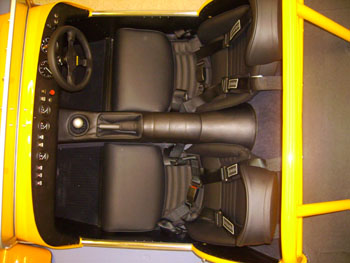 |
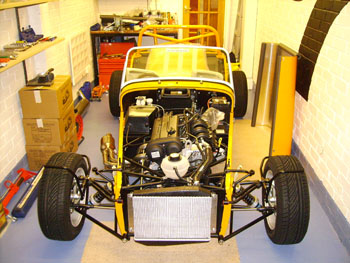
Nearly there? Interior fitted so now theres somewhere for my son to sit and make brum brum noises, I did say my son didnt I! I think the greatest debate on BC is how to fit your front wings, I joined the ranks and put my two peneth in and could hear the masses whove been here before groaning at another sticky stuff thread. Well I went for Sika 221 because I know how good the stuff is in our industrial applications where products are exposed to vibration, heat, cold and a chemical atmosphere. Stainless Big Head fasteners completed that job. There, Ill say no more. |
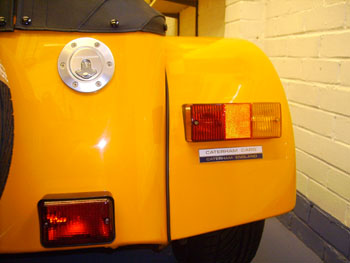
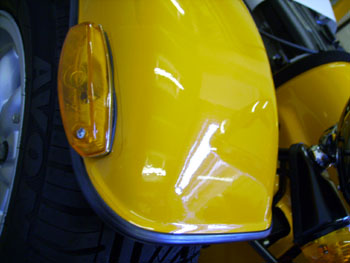
| Rear wings fitted with Stainless protectors and fixed on with a few screws. You cant help but like the simplicity of this thing, after years of owning cars where only the dealer lifted the bonnet its great stuff. Drilling off the holes for the rear lights was more of an issue, if they werent square, level and equally spaced I would be less than happy. In the event a little time positioning then repositioning them got a good result. I wish I had a car sat at the side of me when I was fitting the doors, again I needed them to fit right and the best fit placed the hinge off centre of the steel strip within the door so I decide to drill and tap the door steels so that in effect I wouldnt loose any structural strength in the frame once the screws were in. Last hole and ker rack, 45 minutes later I remove the end of the offending tap and the doors go on. |
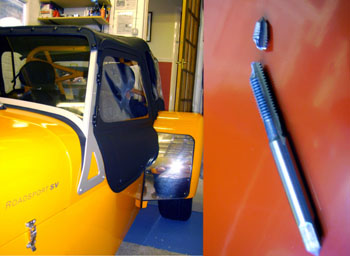 |
| Protective film strategically placed around the shiny paintwork should keep it that way. | |
 |
 |
 |
Back to Caterham Midlands for the PBC, I think the chap was quite pleased with it, he put a few pieces of extra trim around bodywork at the opening for the upper wishbone and damper mounting that wasnt in the manual. I already had SVA booked for 1 week later. The only issue I had there was the nearside headlight was shining slightly low. I didnt think this was too bad considering I just made some measurements with a tape rule and marked the centre of the beam on the garage doors. MAC in hand I was well chuffed. Then there was a 6 week wait for the DVLA which also included a visit by a Police Officer from the Vehicle Investigation Branch who came to check the chassis number and take some photos. |
| Letter drops on doormat
., WOOHOO a registration certificate for the car we built. Excellent now I just need some mates to play with! Anyone for a BLAT? Quote: although launch speed was interesting I didnt need my insides rearranging every time I set off through Beverley Bar Did I mention there was a fantastic Viper Blue R400 on Pistonheads last night .. | 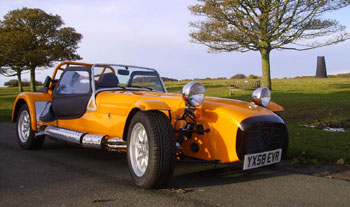 |
